The Joyride Quick-Start Rig Guide:
From Parked to Camp in 10 Minutes
Welcome to the most simple camp setup experience! Our goal at Joyride is to remove the friction from your adventure. This guide will walk you through setting up and packing up your specific rig (Tacoma or 4Runner). This entire process takes less than 10 minutes the first time, and even faster after that.
Relax, we’ve made this easy.
Table of Contents
Vehicle Prep & Campsite Safety
How do I choose the best spot to set up camp?
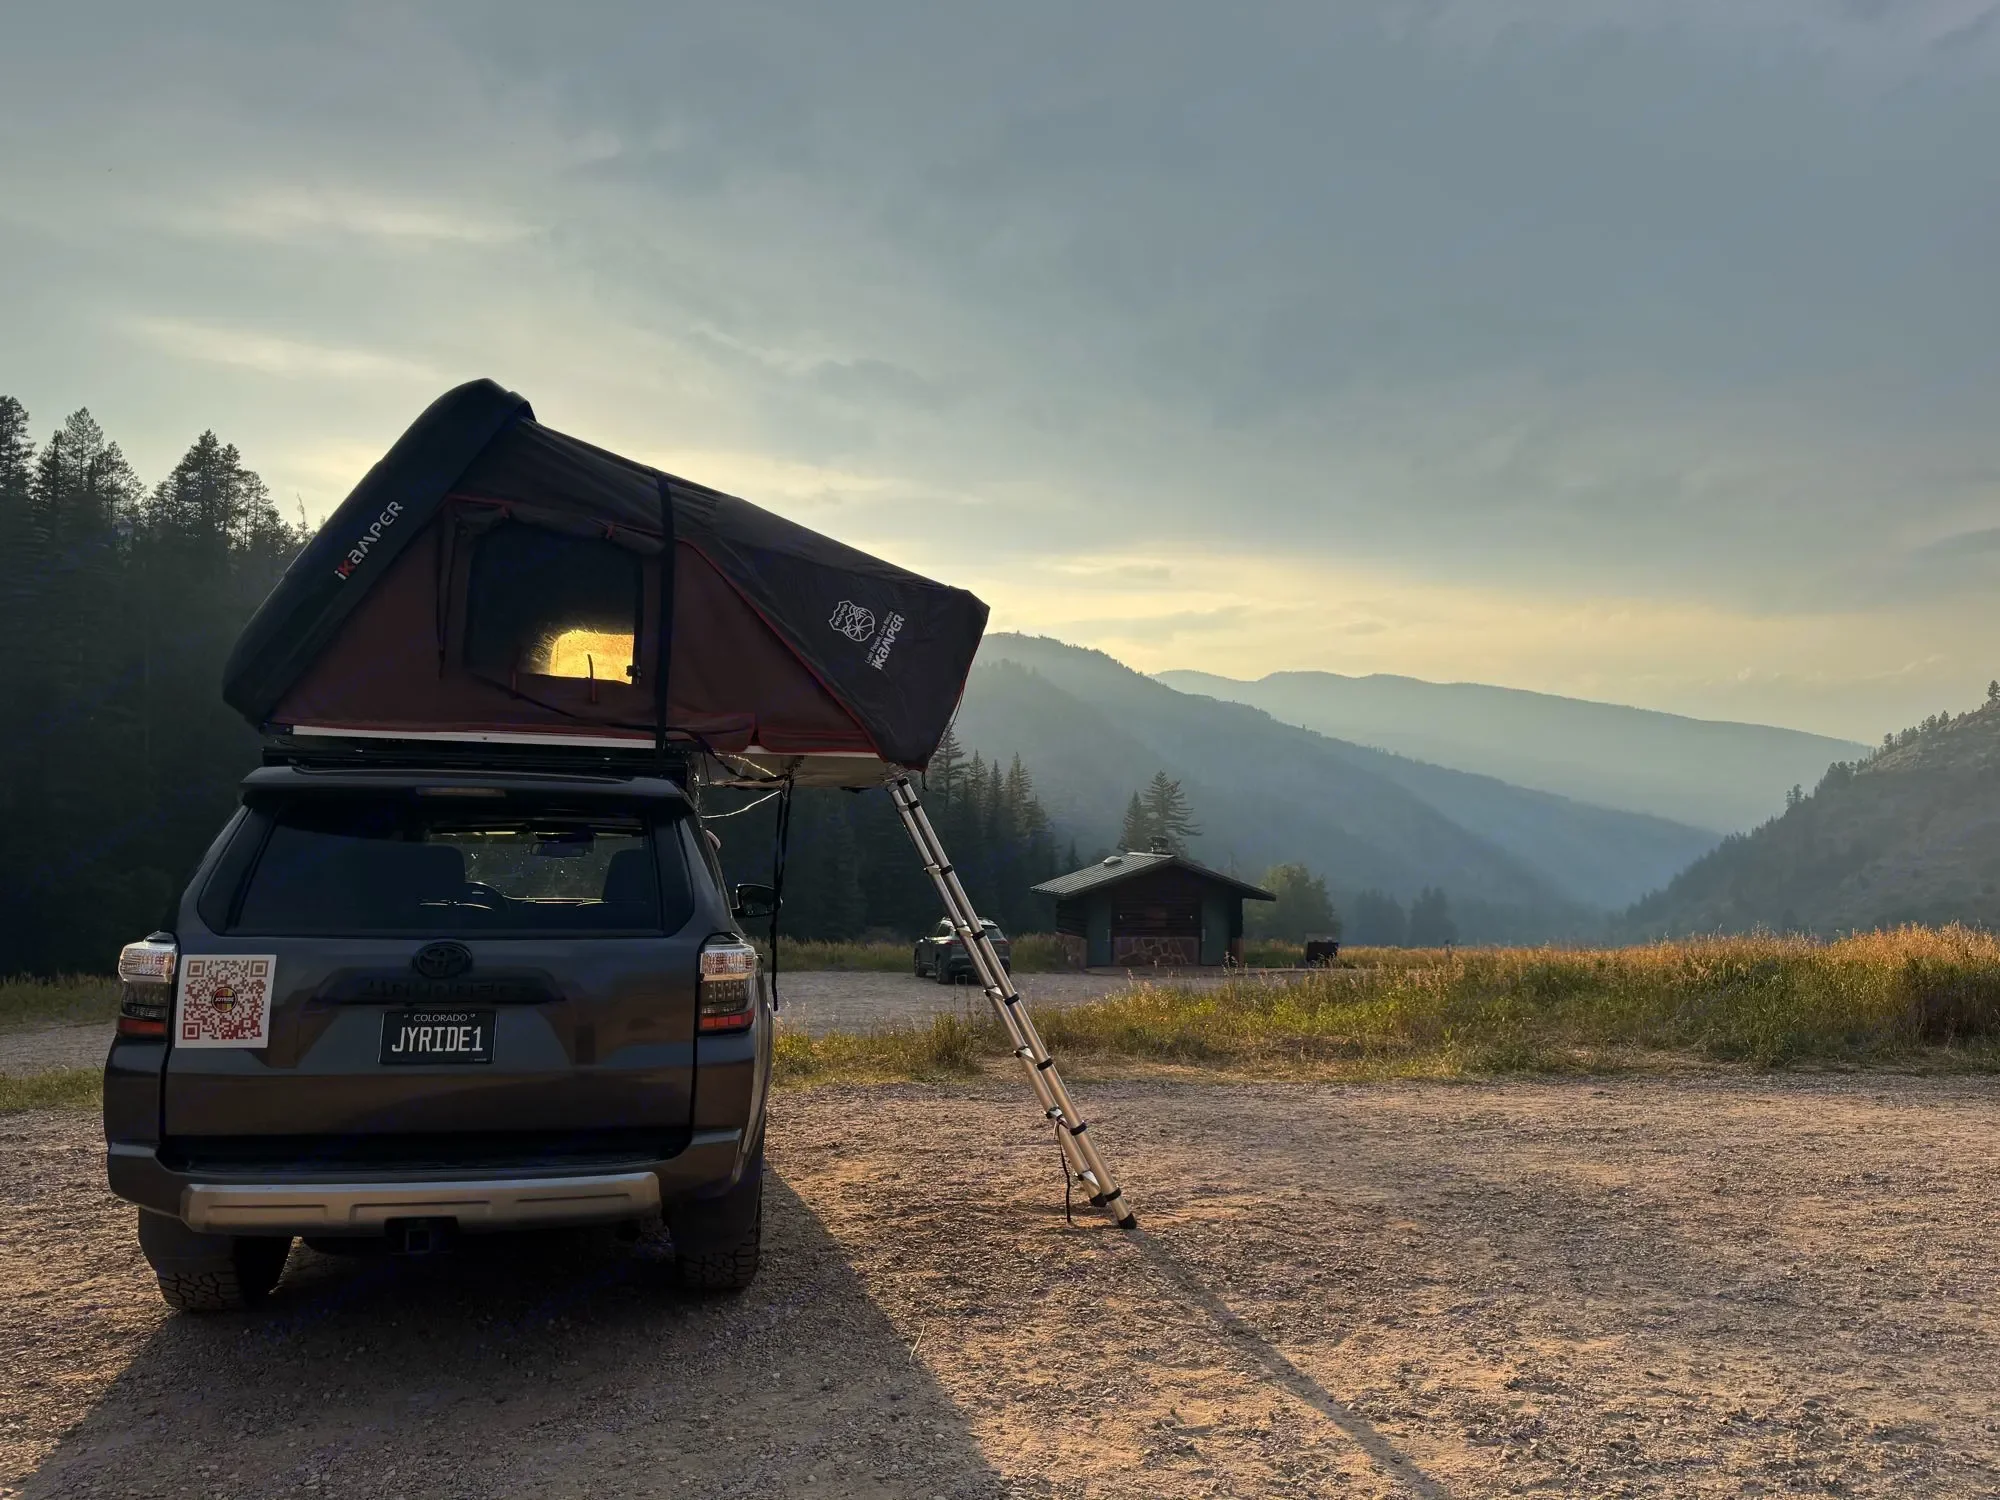
Find Level Ground: Always prioritize a spot that is as flat and level as possible. This makes for a more comfortable night and keeps the tent stable.
Check Clearance: Before driving into a spot, make sure you have vertical clearance for the tent shell and horizontal clearance for the ladder and platform overhang (about 6–8 feet needed on the side where the tent opens).
Face the View: Once you’ve verified safety, face the truck in the direction of the best sunrise or sunset!
How do I engage the parking brake before setting up the tent?
Engage: Once you are perfectly parked, shift the vehicle into Park (P) and pull the parking brake lever up firmly (Tacoma) or step firmly on the leftmost pedal (4runner). To disengage, press the button on the lever and pull up slightly and lower brake lever (Tacoma) or step firmly on the leftmost pedal to release (4runner).
Why? The parking brake ensures the truck will not shift or roll while you are setting up or sleeping, protecting the tent setup and ladder support.
Setting Up the Rooftop Tent
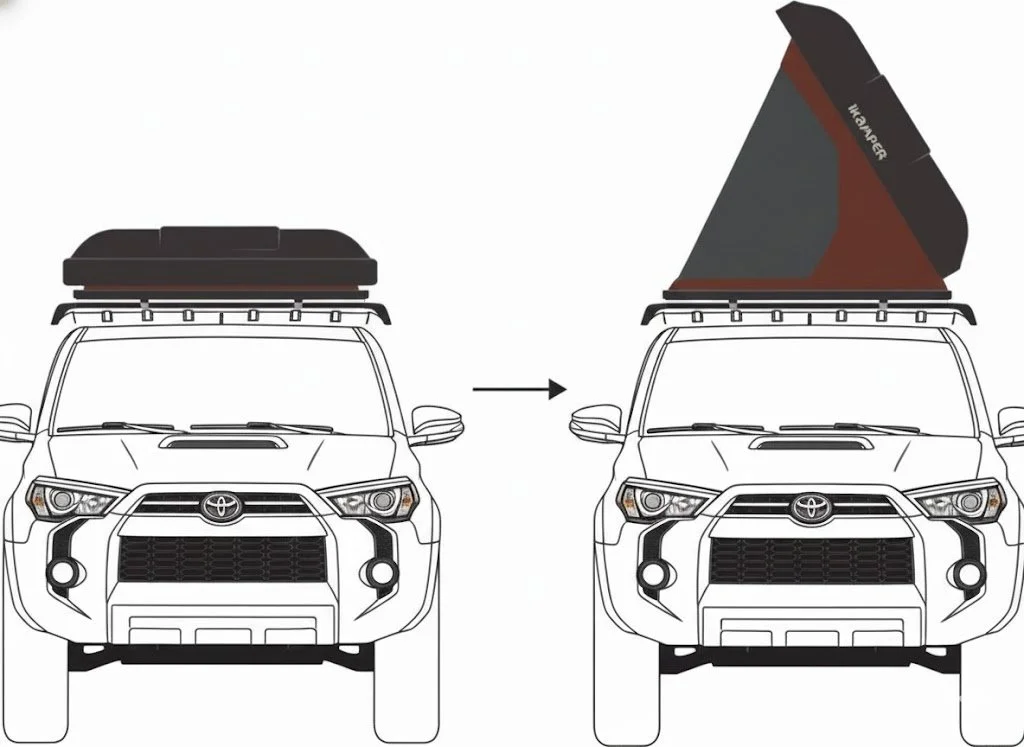
Step 1: Unlatch the Tent Cover
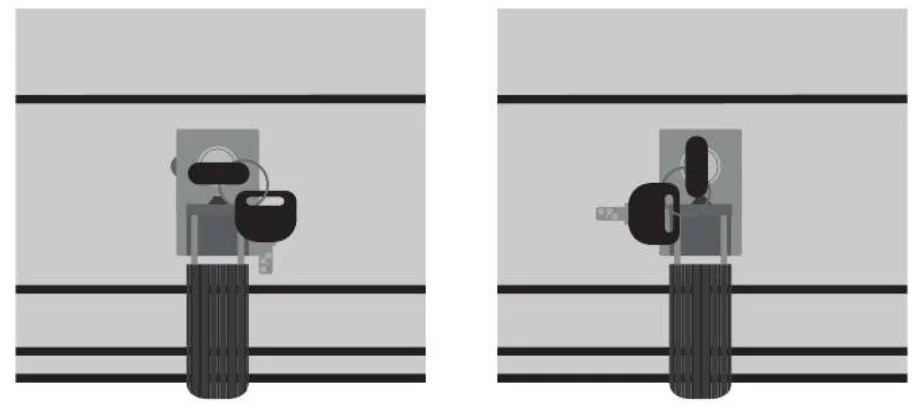
Access Latches: Use the black tent key to unlock the two locking latches on the tent shell.
Unlock: Rotate the latches to unlock the cover.
Lift: Firmly push the lid of the tent shell. It will be assisted by gas struts and should rise smoothly on its own.
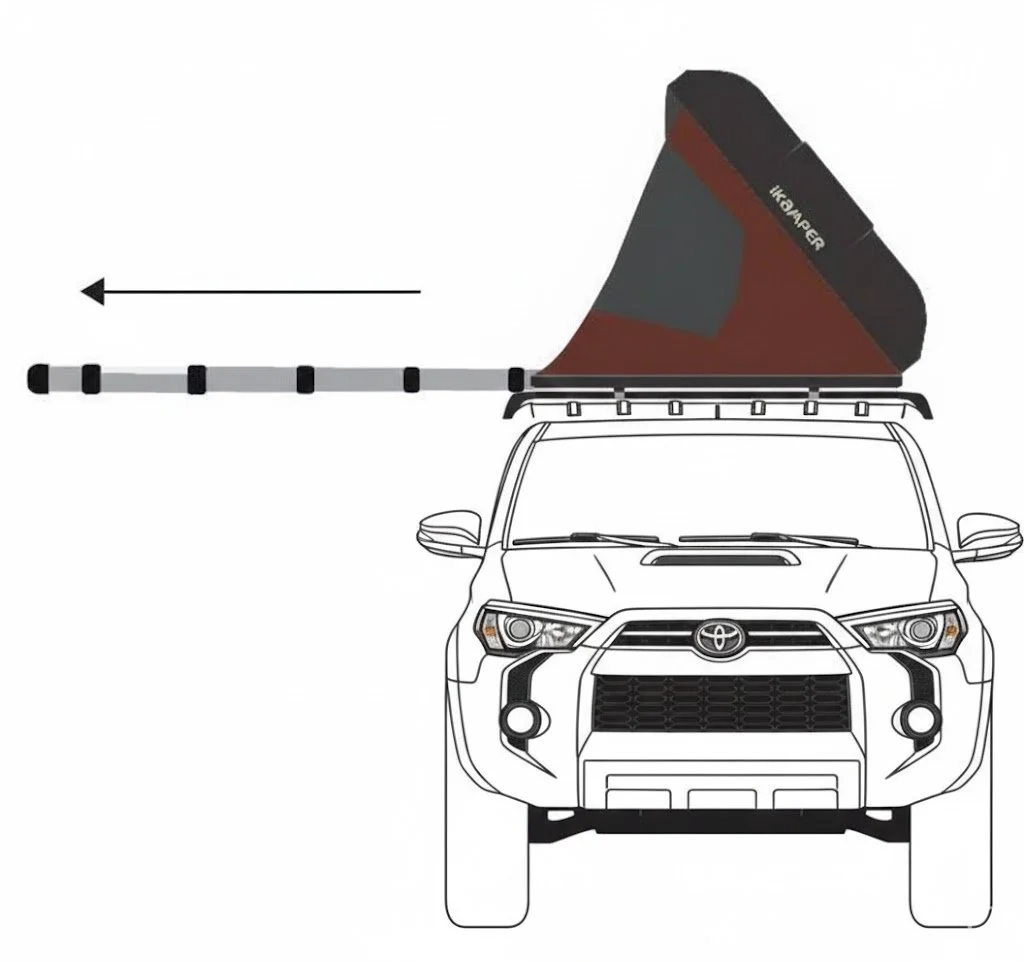
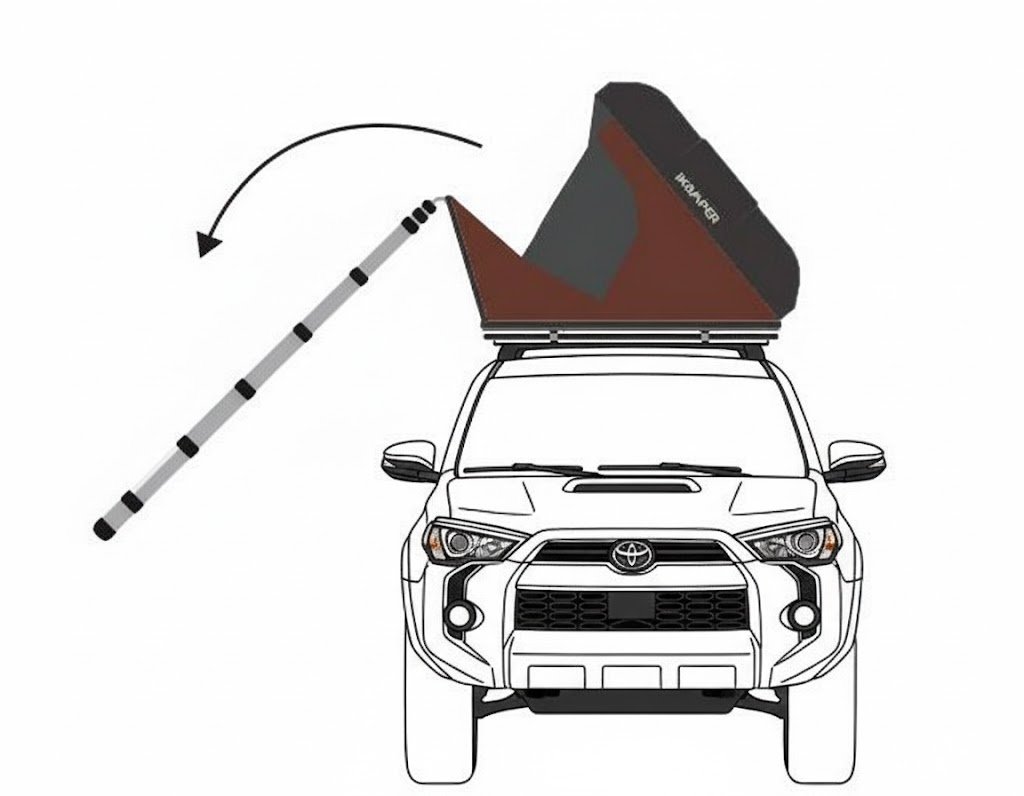
Step 2: Extend the Ladder
Retrieve: Locate the telescoping ladder stored inside the tent.
Extend: Carefully unbuckle the strap and slide the ladder all the way out until it is fully extended.
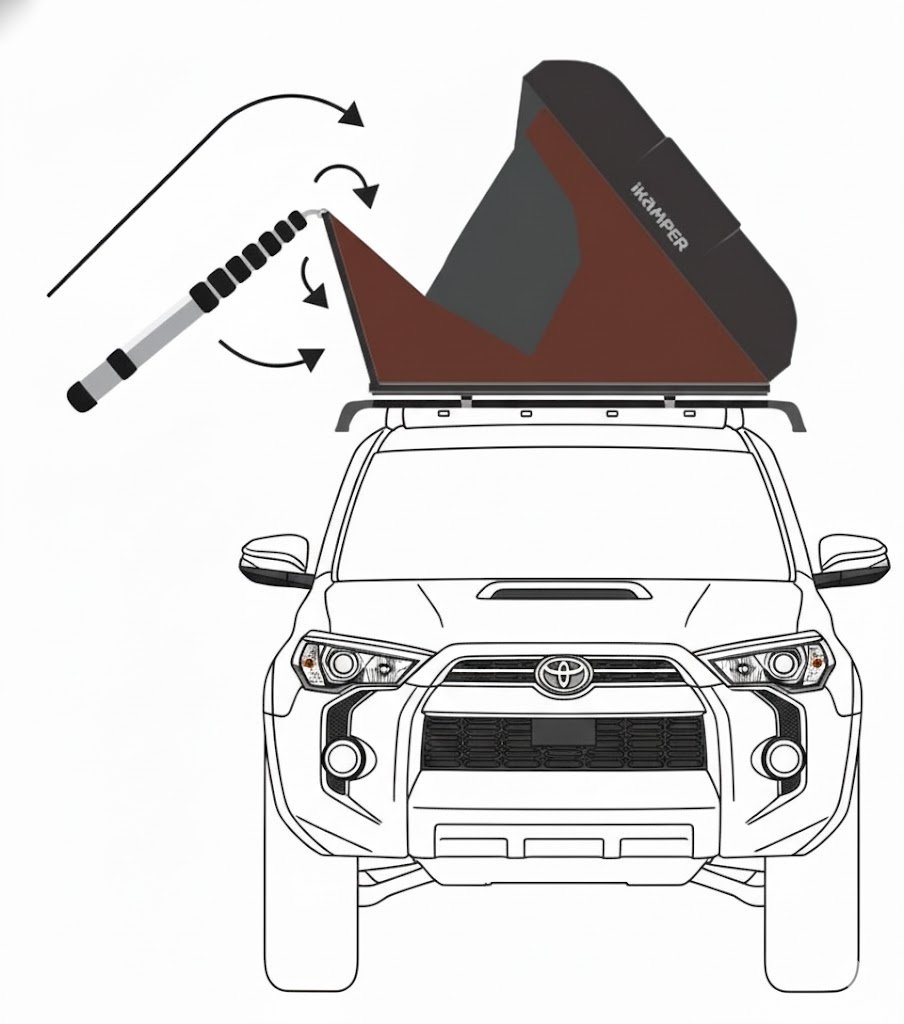
Step 3: Deploy the Tent Platform
Pull Platform Out: Using the ladder as a lever, push the extended ladder down towards the ground, and pull out to unfold the platform
Use Ladder Support: Allow the platform to flip out smoothly, resting its weight on the ground-supported ladder.
Ensure Stability: The ladder is the primary support for the tent platform overhang. Once fully extended, shorten the ladder by pressing two buttons on each rung, starting from the top until the ladder is shortened and angled correctly (about 70-80 degrees). Double-check that the ladder rungs are firmly anchored in the dirt or on level ground. The tent is now fully supported.
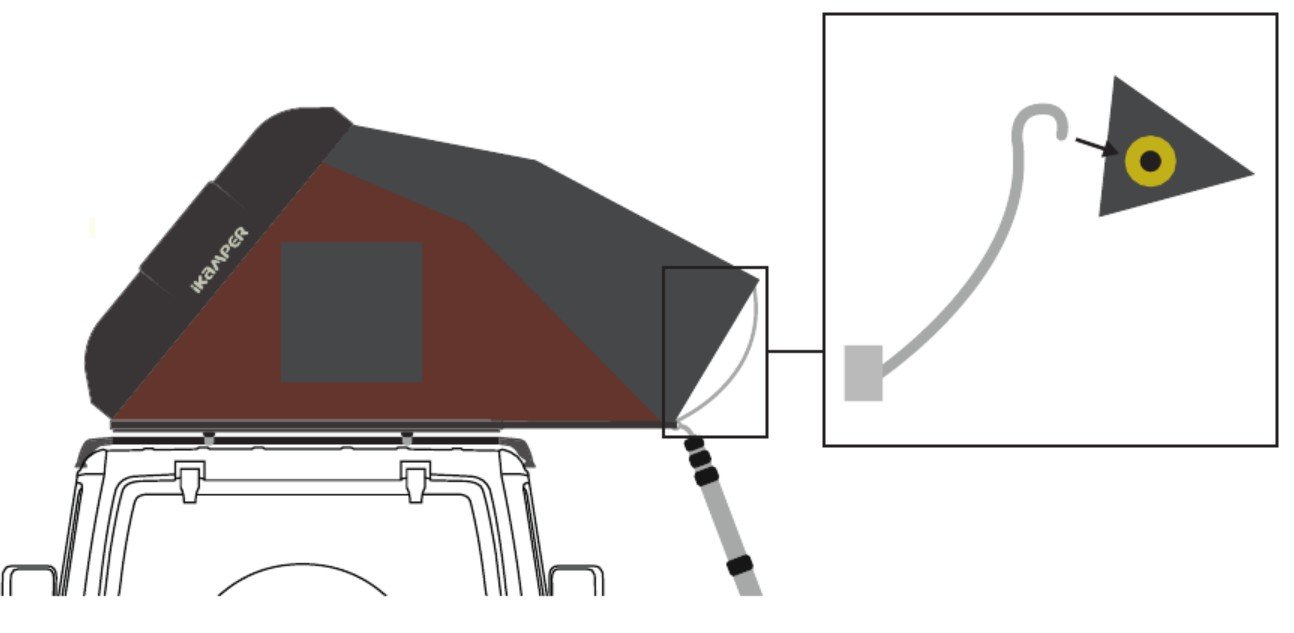
Step 4: Secure the Rain Fly and Poles
Install Entrance Poles: Climb half-way up the ladder, take one rod, and insert the straight end into one of the holes located at the top of the ladder (illustrated below). The rod should be inserted gently until you hear a "click" sound, and the hook at the top end of the rod should be facing down.
Hold the rod with one hand, and with the other grab the corner of the canopy and insert the rod's hook, facing down, into the metal grommet


Step 5: Get Inside!
Climb Carefully: Use the ladder to climb into the tent. Always use the three-points-of-contact rule and face the ladder when descending.
Zip Shut: Zip the main door mesh and windows closed to keep out bugs. Keep the main flaps closed to keep in warmth at night. Enjoy the view!
Packing Up & Moving On
Step 1: Secure Everything Inside the Truck
Final Sweep: Look under the car, in storage bins, and in the cab. Loose items can be damaged or become projectiles on the trail.
Remove Bedding: All pillows, sheets, and bedding must be placed inside the truck cab—do not try to fold them into the tent. Only the thin mattress/pads stay inside.
Close Window/Door Flaps and Remove Rain Fly Poles: Ensure all flaps are zipped closed, leaving an opening at the top or bottom to allow air to escape. Remove rain fly poles and store them inside bag and in car.
Step 2: Folding the Tent
Retract the Ladder: Retract the ladder, starting with the top steps. Make sure to press the release buttons with your thumbs and be careful not to get any fingers caught between steps.
Remove Bedding: Using the ladder, push the extension panel up and then into the Skycamp.
Step 3: Closing the Hardshell
Use the Three Closing Straps: Grab the black nylon strap attached to the top of the shell. Pull down on the strap to close the hard shell. Simultaneously pull the nylon straps on either side to reduce the tent skin residing outside of the hardshell.
Tuck Fabric: Carefully tuck all the tent fabric inward so that no canvas hangs over the edges. This is the most common step beginners forget!
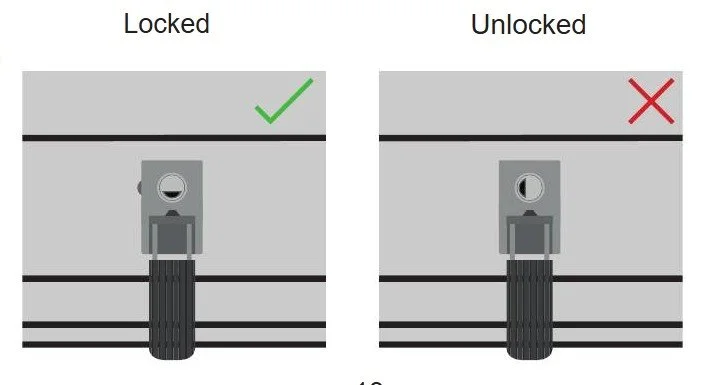
Fasten the Locks: Pull down on the hard shell and securely fasten the locks. IMPORTANT: Make sure both devices are securely locked before driving.

Step 4: Double-Check the Campsite (Leave No Trace)
Always ensure you have left your site better than you found it. Pick up any trash (even if it's not yours) and make sure your fire is dead out (doused with water and cold to the touch).